How to Publish Your React App on Azure Static Web App Using Azure CI/CD
Are you building a React app and want to publish it using Azure? This guide will walk you through deploying your React app to Azure Static Web Apps using Azure DevOps Repos and Azure Pipelines — without GitHub.
Even if you're a beginner, don’t worry. I’ll guide you step-by-step, just like a teacher explaining things in a classroom. 😊
Pre-requisites
Before we begin, make sure you have the following:
-
A React App (using Vite for fast development)
npm create vite@latest
cd <your_app_name> -
Azure Account
Sign up for free: https://azure.microsoft.com/free -
Azure DevOps Account
Create one at: https://dev.azure.com
Step 1: Push Your Code to Azure Repos
- Go to https://dev.azure.com
- Create a new project
- Navigate to Repos > Clone and copy the Git URL
- In your terminal, run the following commands:
git init
git remote add origin https://dev.azure.com/YOUR_ORG/YOUR_PROJECT/_git/YOUR_REPO
git add .
git commit -m "Initial commit"
git push -u origin main
Step 2: Create a Static Web App on Azure
-
Go to the Azure Portal
-
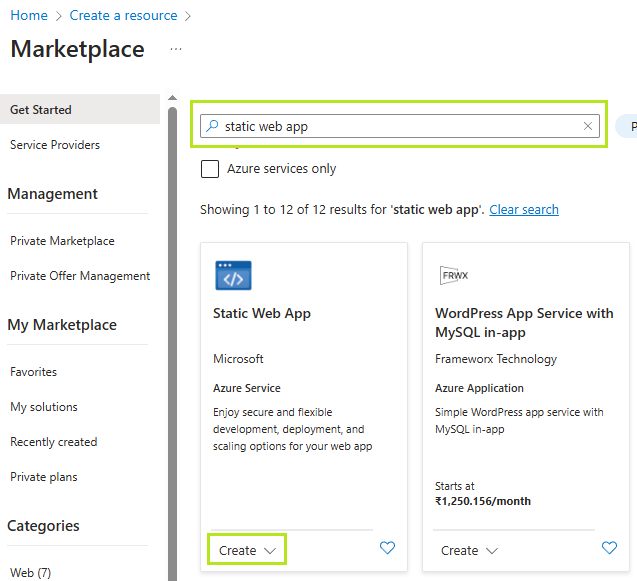
Search for Static Web Apps and click Create
-
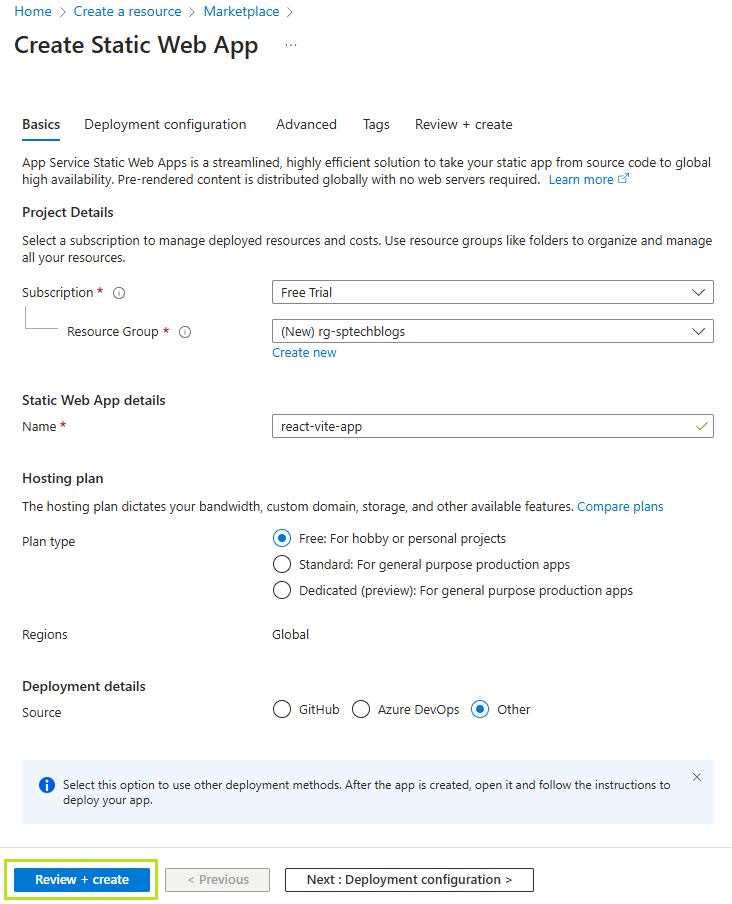
Fill out the form:
- Subscription: Choose your Azure subscription
- Resource Group: Create or select an existing one
- Name: Enter a unique name
- Region: Pick a region near your users
- Deployment Details: Choose Other for source control
-
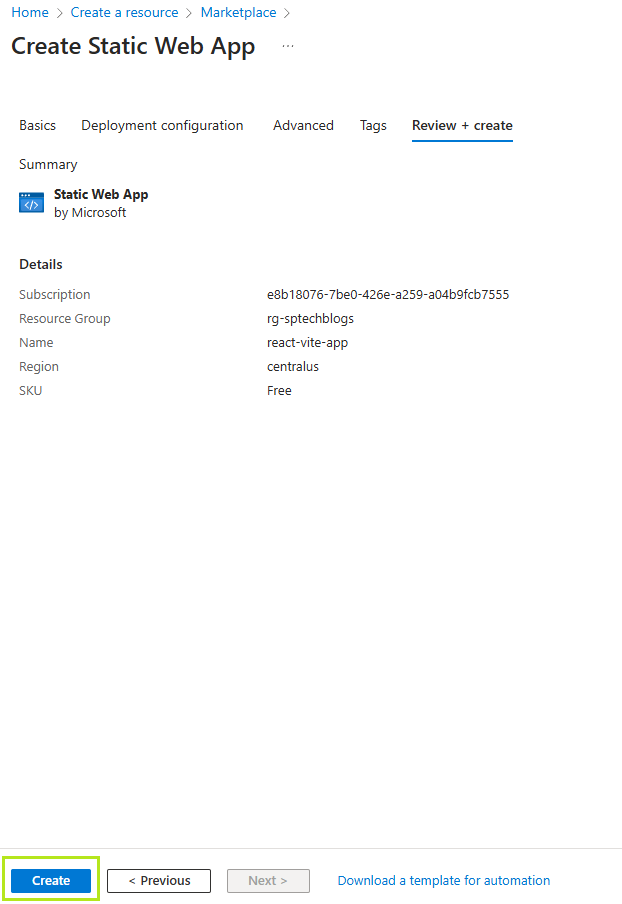
Click Review + Create and then Create
-
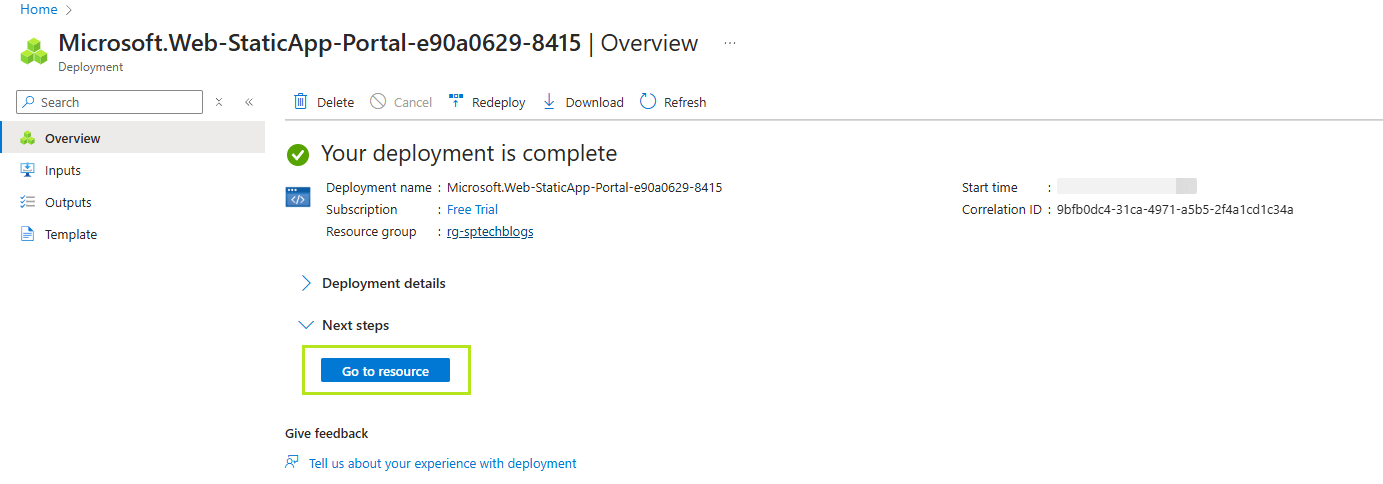
Once deployed, click Go to Resource
Step 3: Set Up Azure Pipeline for CI/CD
- In Azure DevOps, go to your project
- Click on Pipelines > Create Pipeline
- Choose Azure Repos Git as your source
- Select your repo
- Choose Starter Pipeline and replace the YAML with:
trigger:
  branches:
    include:
      - master
      - main

pool:
  vmImage: ubuntu-latest

steps:
  - task: NodeTool@0
    inputs:
      versionSpec: "22.x"
    displayName: "Install Node.js"

  - script: |
      npm install
      npm run build
    displayName: "Build React App"

  - task: AzureStaticWebApp@0
    inputs:
      app_location: "/"
      output_location: "dist"
      azure_static_web_apps_api_token: $(deployment_token)
- Click Save and run
Step 4: Add Deployment Token to Pipeline
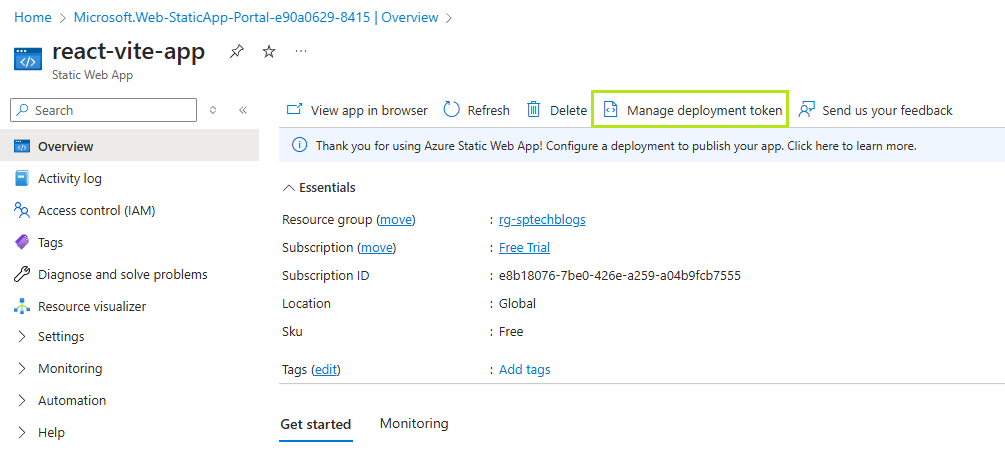
The deployment token authorizes your pipeline to deploy to Azure.
-
In the Azure Portal, open your Static Web App
-
Under Settings, click Manage Deployment Token
-
Copy the token
In Azure DevOps:
-
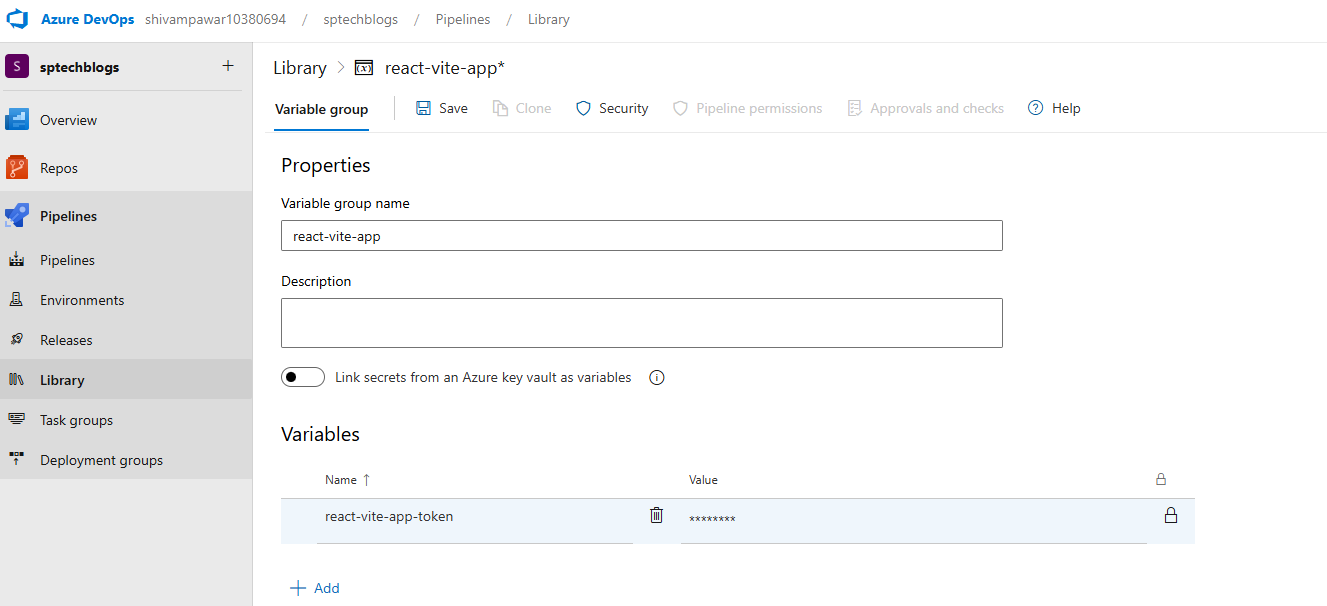
Go to Pipelines > Library
-
Create a new Variable Group
-
Add a variable:
- Name:
deployment_token - Value: Paste the token you copied
- Keep this value secret: ✔️
- Name:
-
Link this variable group to your pipeline by adding it to your YAML file:
variables:
  - group: <YOUR_VARIABLE_GROUP_NAME>
Final azure-pipelines.yml File (With Token Variable Group)
trigger:
  branches:
    include:
      - master
      - main

pool:
  vmImage: ubuntu-latest

variables:
  - group: react-vite-app

steps:
  - task: NodeTool@0
    inputs:
      versionSpec: "22.x"
    displayName: "Install Node.js"

  - script: |
      npm install
      npm run build
    displayName: "Build React App"

  - task: AzureStaticWebApp@0
    inputs:
      app_location: "/"
      output_location: "dist"
      azure_static_web_apps_api_token: $(deployment_token)
ℹ️ With the
triggerconfiguration, the pipeline will automatically run every time new code is pushed to themainormasterbranch.
Step 5: Access Your Live Web App
-
Go to the Azure Portal
-
Open your Static Web App resource
-
Copy the URL from the overview page

-
Open the URL in your browser to see your deployed React app live! 🎉
Summary
Here's a recap of what you did:
- Created and pushed a React app to Azure Repos
- Created a Static Web App on Azure
- Set up a CI/CD pipeline using Azure Pipelines
- Used a secure deployment token to publish your app
- Launched and verified your deployed site
You’ve now published your first React app to Azure without using GitHub! Keep building, keep exploring.
If you found this article useful, please share it with your friends and colleagues!❤️
Read more articles on ➡️ Dev.To
Follow me on ⤵️
